In the previous article we learn about What is JavaScript , In this article we learn how to use and where to use JS in the HTML Document. JS Intro
How do you integrate JavaScript into HTML?
You have two options, internal or external. Internally you will include the JavaScript code in the HTML document between <script> tags. Generally these tags will be in the <head> section or right before the </body> tag.
Externally, the code will be written and saved in a different file. For example, say I wrote a script and saved it in script.js, Now in my HTML document I can link to it like this: <script src=”script.js”></script>
The <script> tag (internal)
JavaScript programs can be inserted almost anywhere into an HTML document using the <script> tag.
But it’s good to place Scripts tag in the <body>, or in the <head> section of an HTML page.
script>
        alert('Hello, world!');
</script>
Example:
<!DOCTYPE html>
<html>
<head> </head>

<body>
    <h1>Welcome</h1>
    <script>
        alert('Hello world!');
    </script>
</body>

</html>
Output:

Inside the <head> tag
<!DOCTYPE html>
<html>
<head>
    <script>
        alert('Hello world!');
    </script>
</head>
<body>
    <h1>Welcome to fullstackadda.com</h1>
</body>
</html>
External scripts
If we have a lot of JavaScript code, we can put it into a separate file.
Script files are attached to HTML with the src attribute.
<script src="script.js"></script>Example:
demo.html
<!DOCTYPE html>
<html>
<head>
    <script src="demo.js"></script>
</head>

<body>

    <h2>JavaScript Demo</h2>
    <p id="p1">A Paragraph</p>
    <button type="button" onclick="myFunction()">Try it</button>
</body>

</html>
demo.js
function myFunction() {
  document.getElementById("p1").innerHTML = "Paragraph changed.";
}
Output: Before clicking the button

After clicking the button the paragraph element “Hello” changed to Welcome to Fullstackadda.com

How to access HTML element in JavaScript file ???

There are a many ways to do this:
- Element by Id.
- Element by ClassName.
- Element by Name.
- Element by TagName.
You can use any of them depending on structure of HTML code
1. Element by Id:
document.getElementById(‘demo’) means a reference to the element on your document which has the ID of demo. Most developers use unique ids in the whole HTML document. The user has to add the id to the particular HTML element before accessing the HTML element with the id.
document.getElementById(element_ID);<!DOCTYPE html>
<html>
<head></head>
<body>
<div id="demo"></div>
</body>
</html>document.getElementById("demo").innerHTML="Hello World" ;2. Element by ClassName:
document.getElementByClassName(‘demo’) access elements using a particular className, we can access multiple HTML elements bearing the same classNames and also edit some of its properties.
document.getElementsByClassName(element_classnames);Example:
<!DOCTYPE html>
<html>

<head></head>

<body>

    <!-- Multiple html element with test & test2 class name -->
    <h1 class="test">Fullstackadda.com</h1>
    <h1 class="test2">Fullstackadda.com</h1>

</body>

</html>
const demo = document.getElementsByClassName("test");
const demo2 = document.getElementsByClassName("test2");
demo[0].style.backgroundColor = "red";
demo2[0].style.backgroundColor = "green";Output:

3. Element by Name:
In HTML, the document.getElementsByName() method is used to return a collection of elements that have the specified name attribute. This method is useful when you want to select one or more elements based on their name attribute, instead of using other methods such as getElementById() or getElementsByTagName() which are based on the element’s id or tag name, respectively.
document.getElementsByName(element_name);Example:
<!DOCTYPE html>
<html>

<body>
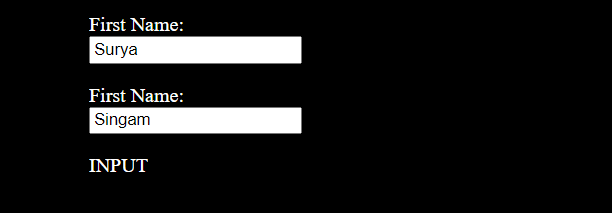
    <p>First Name: <input name="fstname" type="text" value="Surya"></p>
    <p>First Name: <input name="fname" type="text" value="Singam"></p>
    <p id="demo"></p>
</body>

</html>
let byName = document.getElementsByName("fstname");
document.getElementById("demo").innerHTML = byName[0].tagName;Output:

